Who Can Customize Spaces?
Only users with Admin privileges for a Space can modify its settings. When you create a Space, you’re automatically assigned as an Admin.
- Space details (name, icon, description)
- AI assistant behavior ()
- documents
- Member access and permissions
Accessing Space Settings
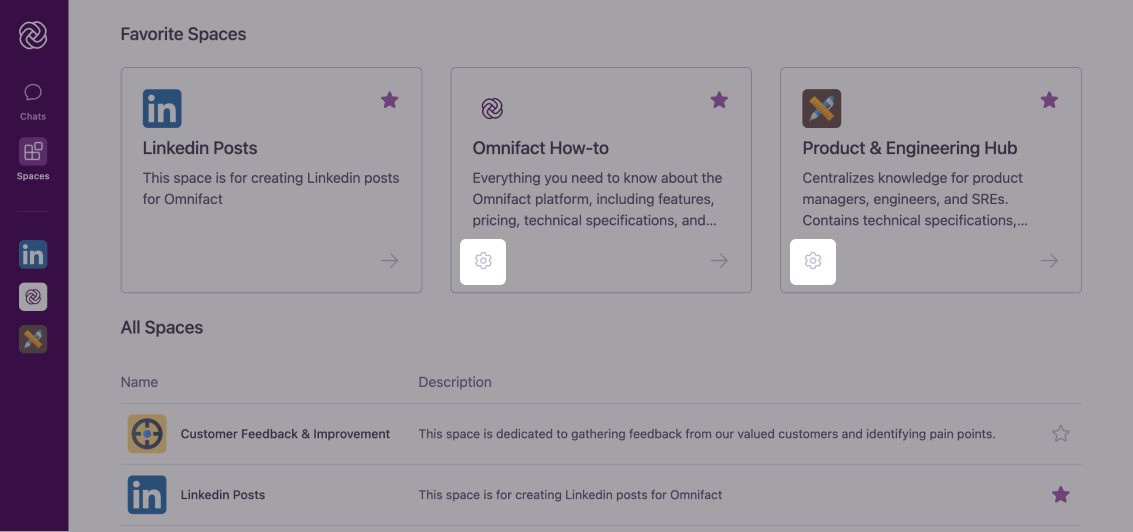
There are three ways to access the settings for a Space. Via Space Details Sidebar: While in a Space, locate the Expand Sidebar icon at the top right of the chat interface. Click this button to open the Space Details sidebar. In the sidebar, click the Space Settings button (cog icon). Via Space Header: Alternatively, look for the cog icon directly in the Space Header at the top of the chat history sidebar and click it to access Settings.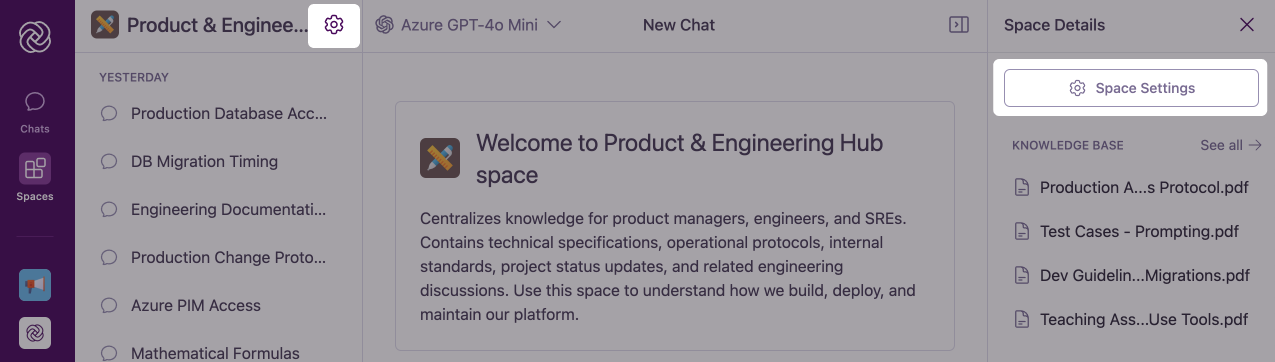
Space Settings Interface
The Space Settings interface is organized into tabs, each focusing on a different aspect of Space customization:- Details
- Knowledge Base
- Members
The Details tab allows you to modify basic Space information and AI behavior.
Customizing Space Details
In the Details tab, you can modify all the elements you initially configured when creating the Space. The interface is similar to the Space creation form, allowing you to update:- Space Icon: Change the visual identifier for your Space
- Space Name: Update the title that appears in Space listings and headers
- Space Description: Revise the description to better reflect the Space’s purpose
- : Fine-tune how your AI assistant behaves and responds
- Example : Add, edit, or remove prompts
are particularly important as they define your AI assistant’s behavior and expertise. Even small adjustments can significantly impact how the responds to questions.
Managing Knowledge Base Documents
The Knowledge Base tab allows you to add, remove, and manage documents that provide specialized knowledge to your Space’s AI assistant.For detailed information on working with Knowledge Base documents, read: Managing Knowledge Bases within Spaces
Managing Space Members
The Members tab lets you control who has access to your Space and what level of permissions they have.For more details on sharing Spaces and managing team access, refer to: Sharing Spaces with Colleagues
Best Practices for Space Customization
Regular Reviews
Schedule periodic reviews of your Space settings to ensure they remain aligned with current needs and goals.
Iterative Refinement
Gradually refine your Space Instructions based on the quality of AI responses and user feedback.
Knowledge Management
Keep your Knowledge Base current by adding new documents and removing outdated ones.
Permission Audits
Regularly review member access to ensure only appropriate team members have Admin privileges.
Common Questions
Will changes to Space settings affect ongoing conversations?
Will changes to Space settings affect ongoing conversations?
Changes to Space settings (especially Space Instructions) will affect new messages in existing conversations, but won’t retroactively change previous AI responses. For best results, start a fresh conversation after making significant changes.
How quickly do Space setting changes take effect?
How quickly do Space setting changes take effect?
Changes to Space settings are applied instantly, allowing you to immediately start testing your changes. The AI assistant will automatically incorporate the updates in its next response.
How flexible is the Space customization system?
How flexible is the Space customization system?
Omnifact’s Space customization is highly adaptable, letting you fine-tune everything from the AI’s behavior to document management. This flexibility ensures your Space can evolve alongside your team’s needs.
What happens to existing members when I update the Knowledge Base or Space Instructions?
What happens to existing members when I update the Knowledge Base or Space Instructions?
When you update the Knowledge Base or Space Instructions, the changes take effect immediately for all Space members. The AI assistant will automatically adapt its behavior and responses according to the new settings, ensuring a consistent experience across your team.
Next Steps
Now that you know how to customize your Spaces, you might want to explore:- Learn how to effectively add and organize documents by Managing Knowledge Bases within Spaces
- Discover how to collaborate with your team by Sharing Spaces with Colleagues
- Understand how the AI uses your documents with Knowledge Base Retrieval