

How SharePoint Setup Works at a Glance
Setting up SharePoint involves three quick steps across your workspace roles:1. Organization Admin
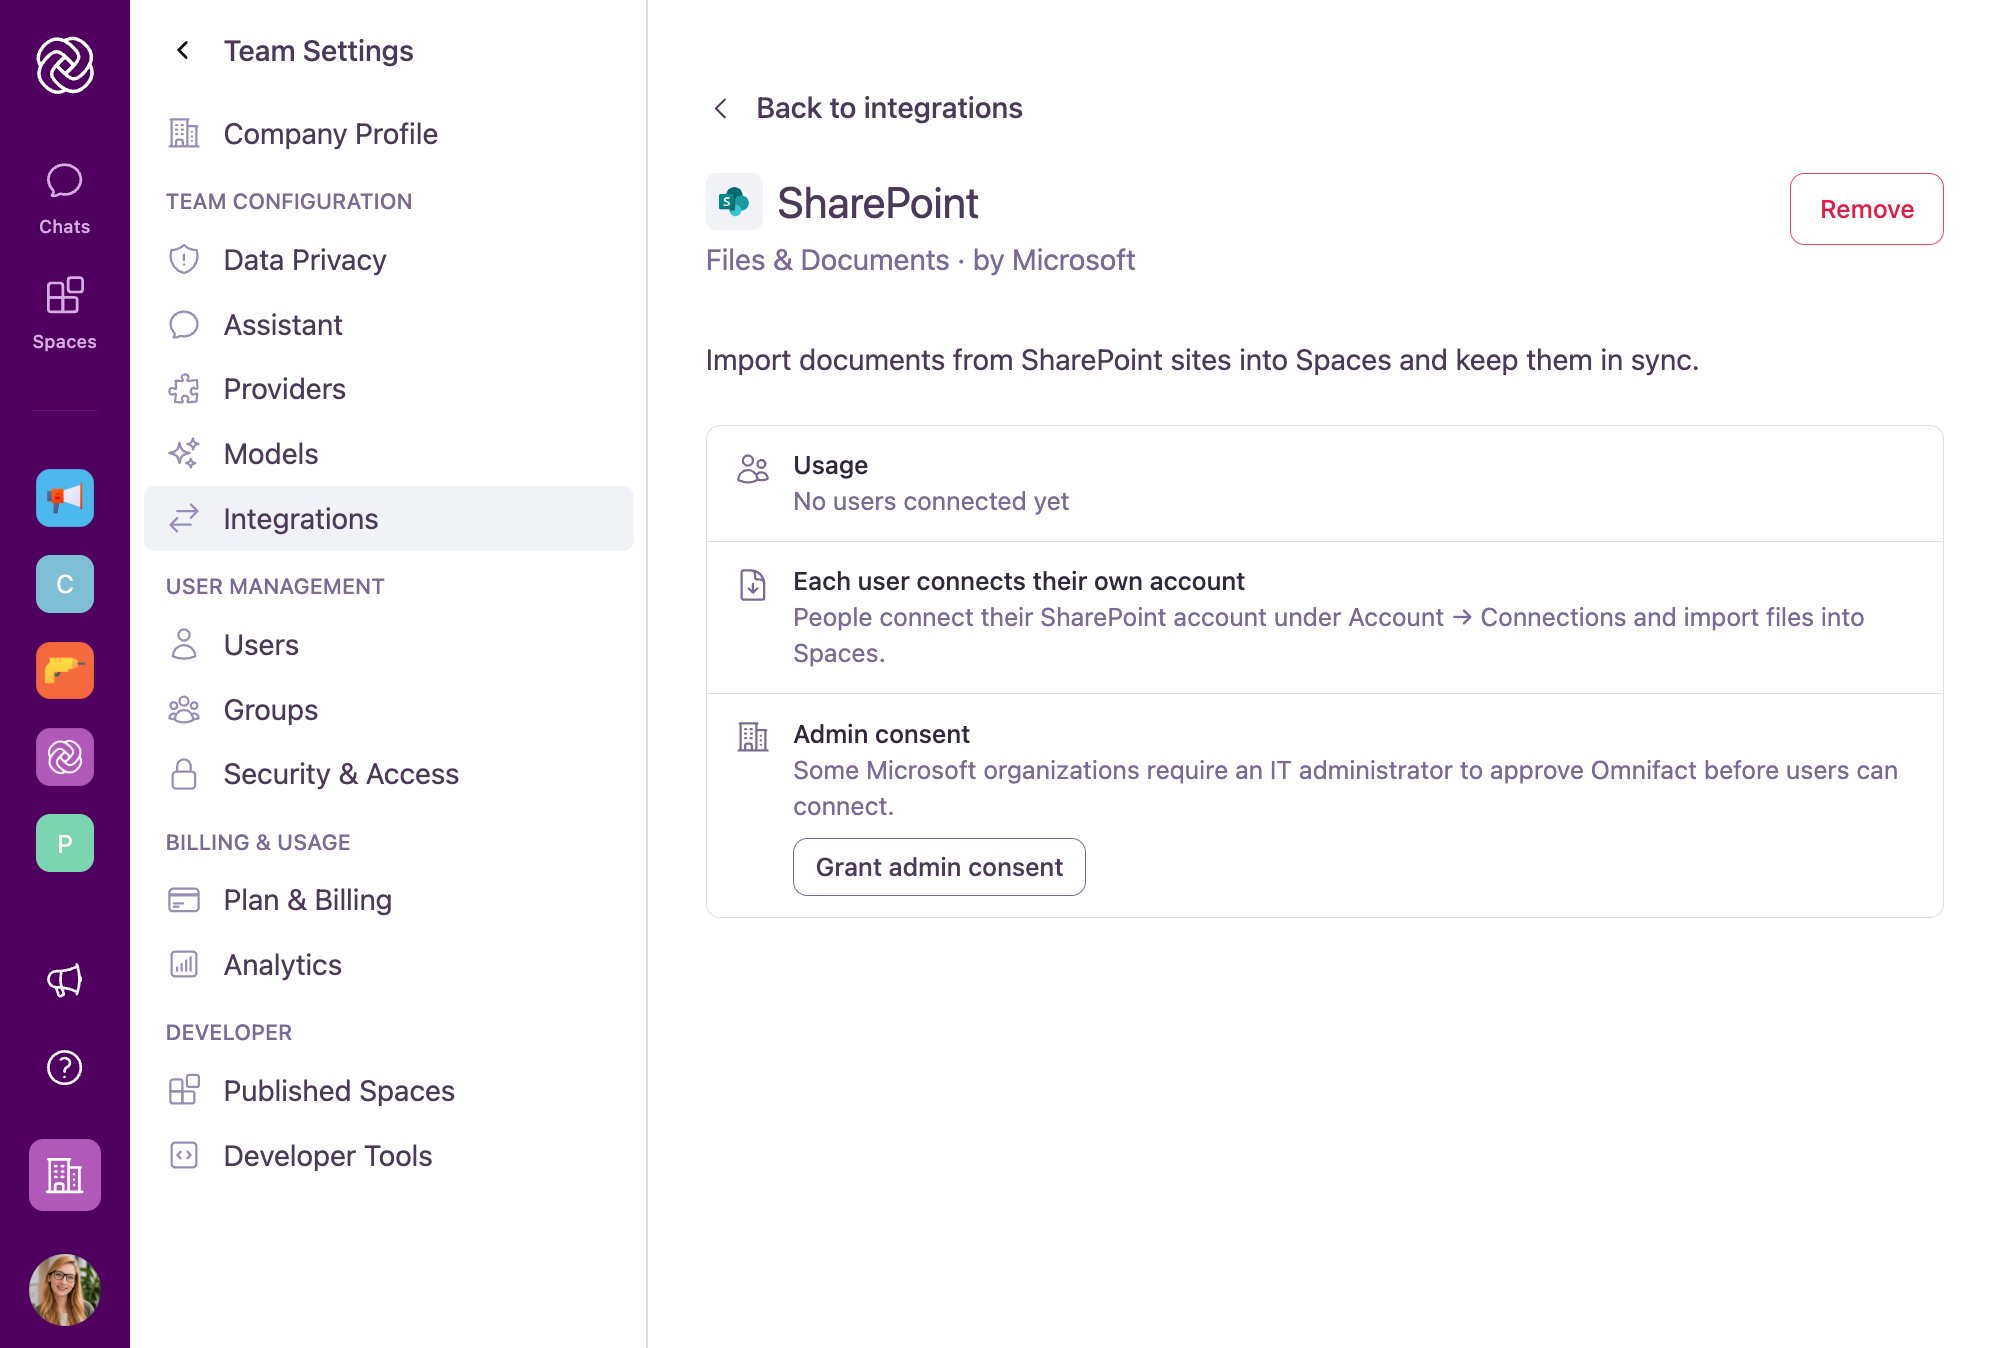
Enables SharePoint once in Team Settings > Integrations and completes one-time Microsoft Entra ID Admin Consent if required by your tenant.
2. Team Members
Connect their personal Microsoft 365 account in Account Settings > App Connections to attach SharePoint files in chat.
3. Space Admins
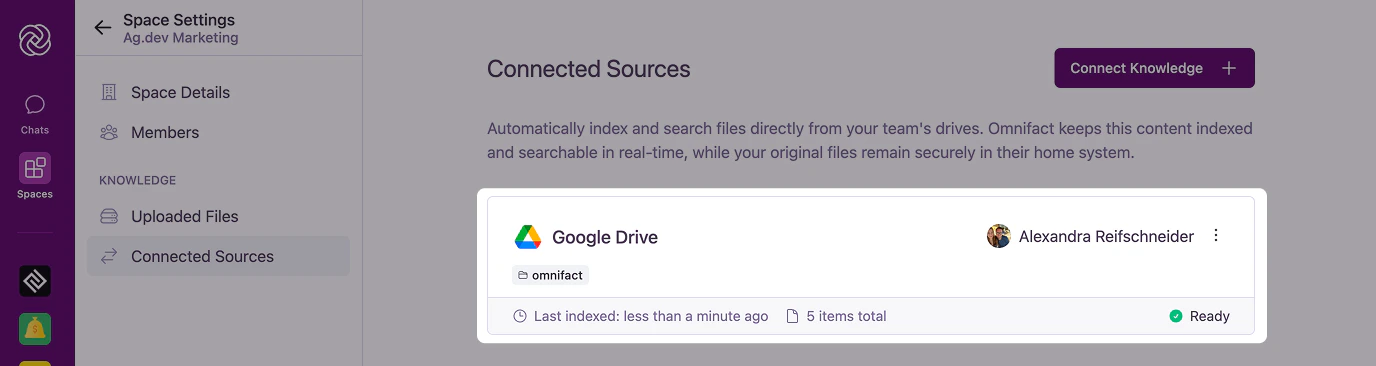
Link specific SharePoint team sites and folders to a under Connected Sources for automatic background sync.
Step 1: Enable SharePoint for Your Organization (Admin)
An organization Owner or Admin enables SharePoint once for the entire workspace.1
Open the Integrations Catalog
Click your User Avatar in the bottom-left corner, select Team Settings > Integrations, and switch to the Catalog tab.
2
Add SharePoint
Locate SharePoint under Files & Documents (or use the search bar) and click Add, then confirm in the dialog. SharePoint now appears under your Installed tab.
3
Grant Microsoft Admin Consent (If Required by Entra ID)
Many Microsoft 365 tenants require an IT administrator to approve third-party applications in Microsoft Entra ID (formerly Azure AD) before employees can connect their accounts.Open SharePoint from Team Settings > Integrations > Installed and click Grant admin consent:
- If you are a Microsoft Global Administrator: Click Authorize Organization, sign in with your Microsoft admin credentials, check Consent on behalf of your organization, and click Accept.
- If another IT administrator manages Microsoft Entra ID: Under Need to request access?, click Copy to grab the authorization link and send it to your Microsoft administrator.
Step 2: Connect Your Personal Microsoft 365 Account (All Users)
Once SharePoint is enabled for the organization, each team member links their own Microsoft 365 work account. Omnifact requests strictly read-only permissions and never modifies, renames, or deletes files in SharePoint.1
Open App Connections
Click your User Avatar in the bottom-left corner, select Account Settings, and open App Connections (or navigate directly to
https://chat.omnifact.ai/account/connections).2
Start the SharePoint Connection
Under Available Connections, find SharePoint and click Connect, then click Continue to SharePoint in the confirmation dialog.
3
Sign In with Microsoft 365
Sign in with your Microsoft work or school account in the popup window and accept the permission prompt. Once completed, the popup closes and SharePoint appears under Your Connected Apps with a Connected badge.
Step 3: Sync SharePoint Sites and Folders into a Space (Space Admin)
To make SharePoint document libraries searchable by a Space’s and keep them updated automatically, connect them as Connected Sources.You need Space Admin permissions in the Space to connect sources. If your organization restricts knowledge uploads by group, your group must also have the Manage Knowledge permission enabled.
1
Open Connected Sources in Your Space
Open the target Space, click the Space Settings cog icon in the top header, and select Connected Sources under the Knowledge section.
2
Choose SharePoint
Click Connect Source (or Connect Knowledge), select SharePoint, and click Connect (or Grant Access if you have not linked your Microsoft account yet).
3
Select a SharePoint Site
In the Select a Source Library dialog, open the Location dropdown to search and select the specific SharePoint site (or My files) you want to browse, then click Choose Files.
4
Pick Folders or Documents
In the SharePoint file picker, select one or more folders or individual files that belong in this Space.
5
Confirm the Sync Preview
If your selection contains more than 50 items, Omnifact displays a Sync Preview showing the total item count before indexing starts. Confirm the selection to begin background indexing.
Step 4: Attach SharePoint Files in Chat (All Users)
When you only need to analyze a specific SharePoint document in a single conversation rather than syncing a whole library to a Space:- Click the + (Plus) icon on the left side of the chat input bar.
- Hover over Select File From and choose SharePoint.
- Pick the SharePoint site (or My files) in the location selector, select your files (up to 10 attachments per message, up to 100 MB per cloud file), and send your prompt.
One-Time Snapshot vs. Continuous Sync: Attaching a SharePoint file in chat (or choosing Browse under Uploaded Files) imports a one-time static copy for that conversation or Space. To automatically sync new, edited, and deleted files every 5 minutes, use Connected Sources (Step 3) instead. See Attachments vs. Uploaded Files for a full comparison.
Permissions, Supported Files & Privacy
Related Resources
Connected Sources
Learn how continuous folder synchronization, status indicators, and citations work in Spaces.
Microsoft Admin Consent
Step-by-step troubleshooting for Microsoft Entra ID tenant approval.
Integrations Administration
Manage workspace integrations and connected sources in Team Settings.
Setting Up HubSpot
Connect HubSpot CRM to Omnifact via MCP with per-user sign-in and tool approvals.