Build Your Team
The Users section is your command center for team management. Invite colleagues, assign roles, and ensure everyone has the access they need to succeed with Omnifact. Managing your team size has direct implications for your billing. For more details on costs, please refer to Billing & Usage.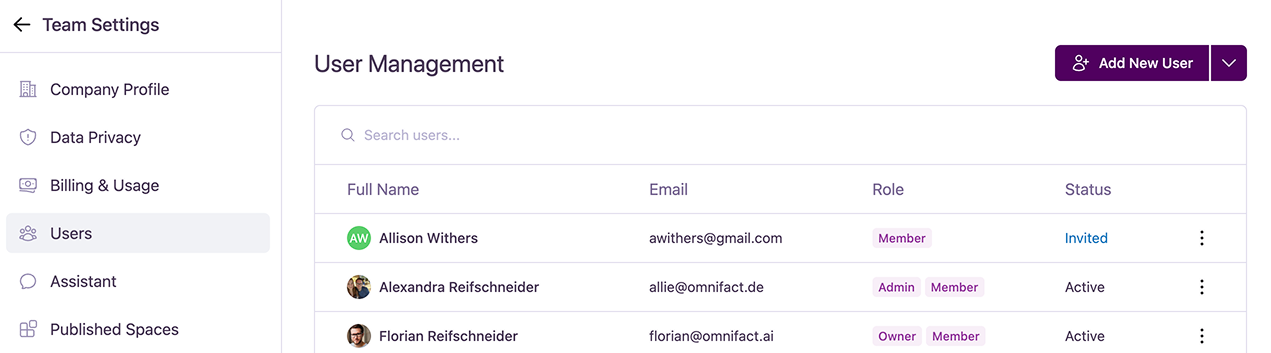
Understanding the User List
The main part of this page is the user list, which provides an at-a-glance view of your team.- Full Name: The user’s full name.
- Email: The email address associated with the user’s account.
- Role: The user’s permission level within the organization (Owner, Admin, or Member).
- Status: The current status of the user’s account (e.g., Active, Deactivated, Invited).
User Statuses
When viewing the user list, you will see different account statuses:- Active: The user has fully set up their account and can log in.
- Invited: An invitation email has been sent, but the user has not yet accepted it (applies to standard authentication).
- Provisioned: The user account has been created automatically via SSO or SCIM, but the user has not yet logged in for the first time.
- Deactivated: The user’s access has been suspended.
Adding New Users
You have two ways to add new members to your team.Add a Single User
Add a Single User
Click the “Add New User” button to open the “Invite User To Team” dialog.
Import Users from a CSV File
Import Users from a CSV File
For adding multiple users at once, you can use the CSV import feature. (Note: This feature is blocked if SCIM provisioning is active).
- Click the dropdown arrow next to the “Add New User” button.
- Select “Download CSV Template” to get a correctly formatted file.
- Fill out the template with the user details (e.g., Full Name, Email, Role). The system strictly validates headers, roles, emails, and duplicates.
- Select “Import CSV File” and upload your completed file.
- Preview & Dry-Run: Before finalizing the import, you will see a dry-run preview of the changes and the projected impact on your subscription seat costs.
Managing Existing Users
For each user in the list, you can click the ”…” (more options) menu on the right to perform various actions.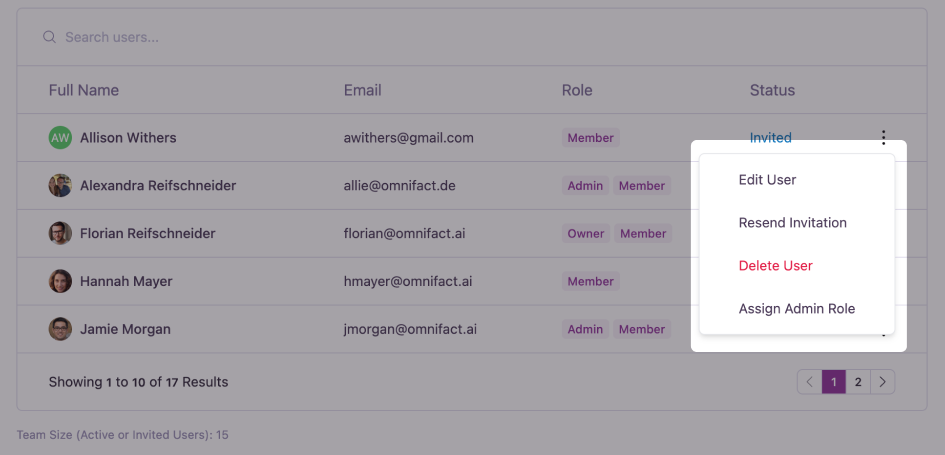
- Edit User: Opens the “Edit User” dialog where you can update the user’s details.
You can modify the First name, Last name, Email, and assign or revoke the Admin role. Click “Update User” to save the changes.

- Deactivate User: Suspends the user’s access to the platform. Their status will change to “Deactivated.” This will prevent them from logging in to the platform.
- Assign Admin Role: Promotes a Member to an Admin, granting them additional permissions. For existing admins, this option becomes “Revoke Admin Role.”
- Resend Invitation: For users with an “Invited” status, this resends the invitation email.
- Delete User: Permanently removes a user from the team. You can only delete users who have not yet accepted the invitation.
User Roles
Omnifact uses a role-based system to manage permissions. Note that roles are normalized: an Owner intrinsically holds Admin and Member roles[OWNER, ADMIN, MEMBER], while an Admin holds [ADMIN, MEMBER].
Owner
The highest permission level. There is typically only one Owner per team. Owners have all Admin rights in the team.
Admin
Admins can manage users, roles, and Team Settings. They can invite and remove users and change the roles of other members (except the Owner).
Member
The Member role is the standard permission level for most users. It grants full access to Omnifact’s core features—including Chat and the ability to create and use Spaces—while restricting access to team-level administrative settings. Members may receive upgraded capabilities (like premium models or web search) if they are added to a Group with those permissions.
Single Sign-On (SSO) & SCIM Provisioning
Single Sign-On (SSO) and SCIM are exclusive features available for customers on the Enterprise Plan.
sso-sync service.
- Automated Lifecycle: Users are automatically created, updated, and deactivated based on your identity provider’s directory.
- Restrictions: When SCIM sync is active, manual user creation, profile editing, role changes, and CSV imports are disabled in the Omnifact interface to maintain a single source of truth.